And Why They Work
Dr. Rani Helvey-Byers, PT, DPT, OCS, RYT-500
Low back pain can be a debilitating condition that affects upwards of 619 million people globally, making it the leading cause of musculoskeletal disability worldwide [1]. Further, treating low back pain is expensive. Studies show the annual average cost spent on treating low back pain ranges from $4,671.13 to $10,430.20 per person [2].
Yoga offers a low cost and effective alternative to manage low back pain by promoting mobility of joints in the spine and hips, and stretching and strengthening key muscles that surround the spine. Researchers at Cleveland Clinic studied the effects of a 12-week yoga program on individuals experiencing chronic low back pain. Participants reported six times greater reduction in pain intensity, 10 times greater improvement in sleep quality, and demonstrated decreased utilization of pain medications when compared to the non-yoga group [3].
Some yoga poses may be more effective than others for improving low back pain. Here are four of the best yoga poses to ease low back pain, along with step-by-step instructions on how to perform them effectively.
1. Revolved Table Top → Thread the Needle Pose
Why it helps:
This gentle twist releases tension in the lower back by stretching the deep muscles and connective tissues around the spine. It also alleviates stiffness by promoting mobility of the spinal segments.
How to perform:
Start on all fours in a tabletop position (hands under shoulders, knees under hips).
- Raise your left arm up into the air as you rotate your chest towards the sky.
- Then, reverse the direction by sliding your left arm under your right arm as you sit your hips back into child’s pose.
- Walk your right fingertips forward for a deeper sidebody stretch.
- Hold the pose for 30 seconds to 1 minute.
Return to the starting position and switch sides.
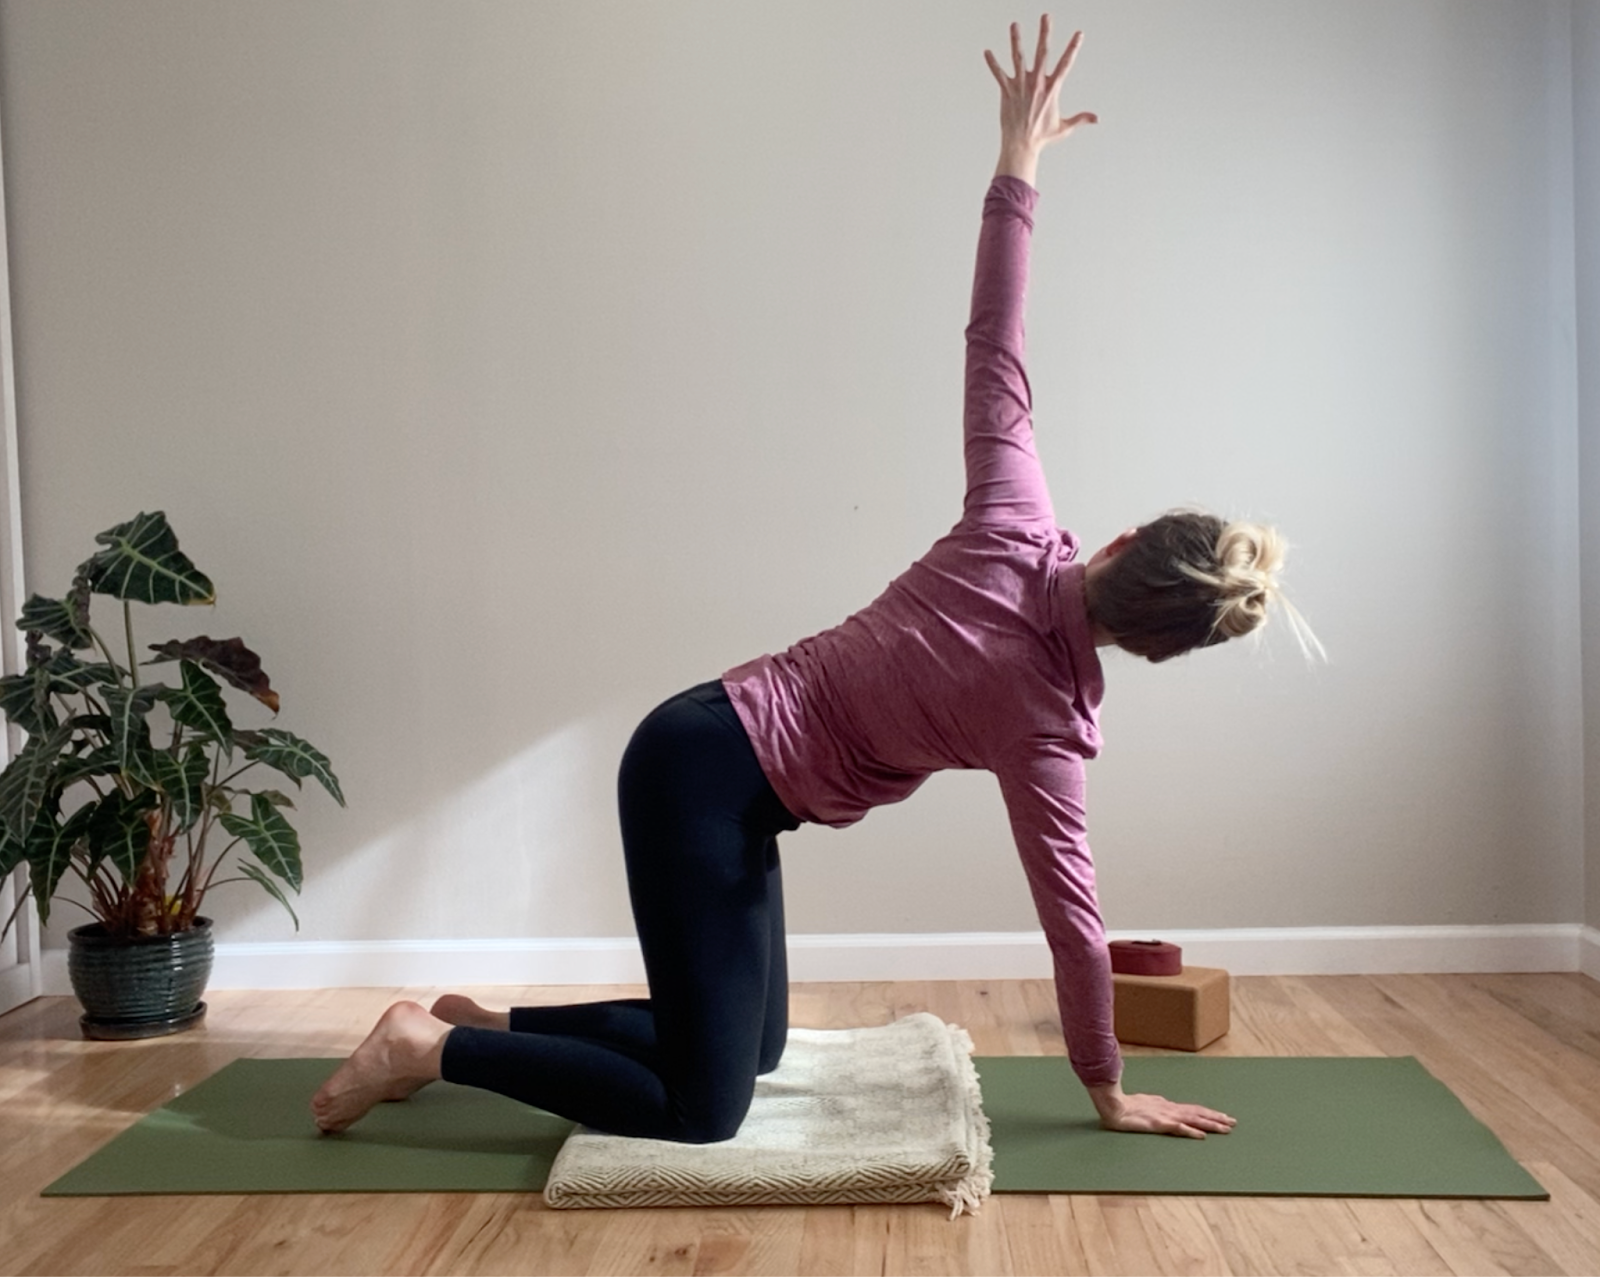
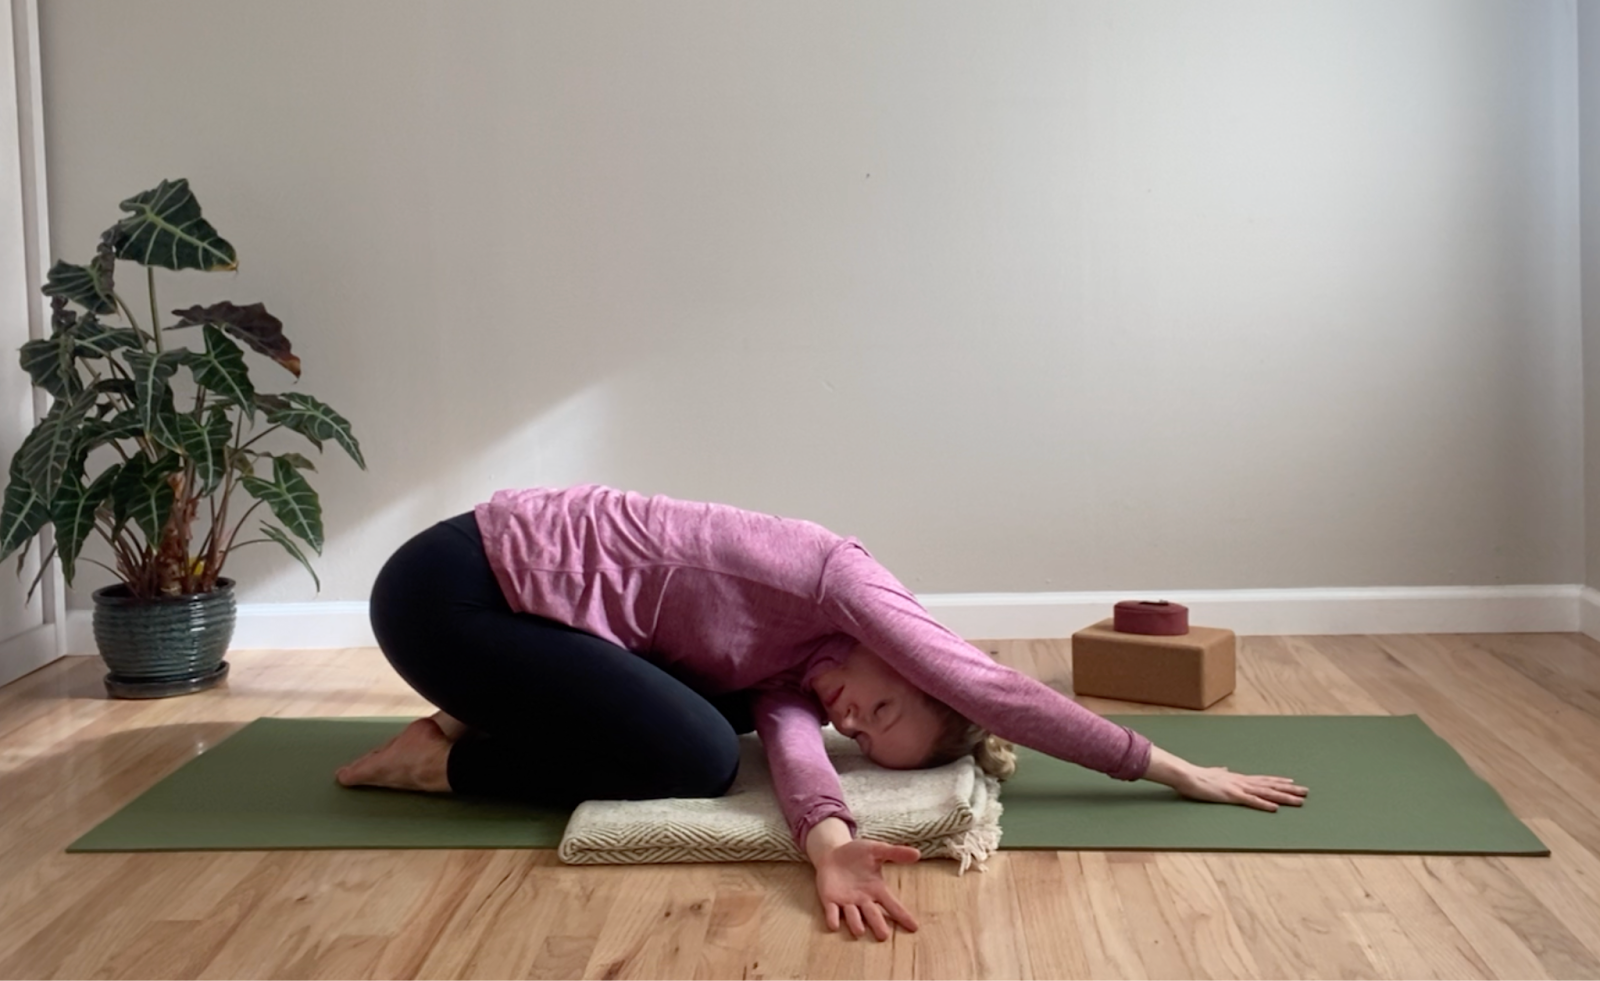
Modifications:
If your knees cannot tolerate full bending, place a pillow in between your calves and thighs.
Alternatively, you can thread the needle without sitting back into child’s pose.
2. Low Lunge
Why it helps:
This pose stretches the hip flexors, which attach directly to the lumbar spine and often become tight from prolonged sitting. It also tones the hip, core, and back muscles which all work together to support the spine.
How to perform:
Begin in a tabletop position and step your right foot forward between your hands.
- Slide your left knee back about one hand’s distance.
- Lift your chest and place your hands on the mat, your right thigh, or raise them overhead for a deeper stretch.
- Tuck your tailbone to engage your abdominals and bring the stretch deeper into the hip flexor.
Hold for 30 seconds to 1 minute, then switch sides.
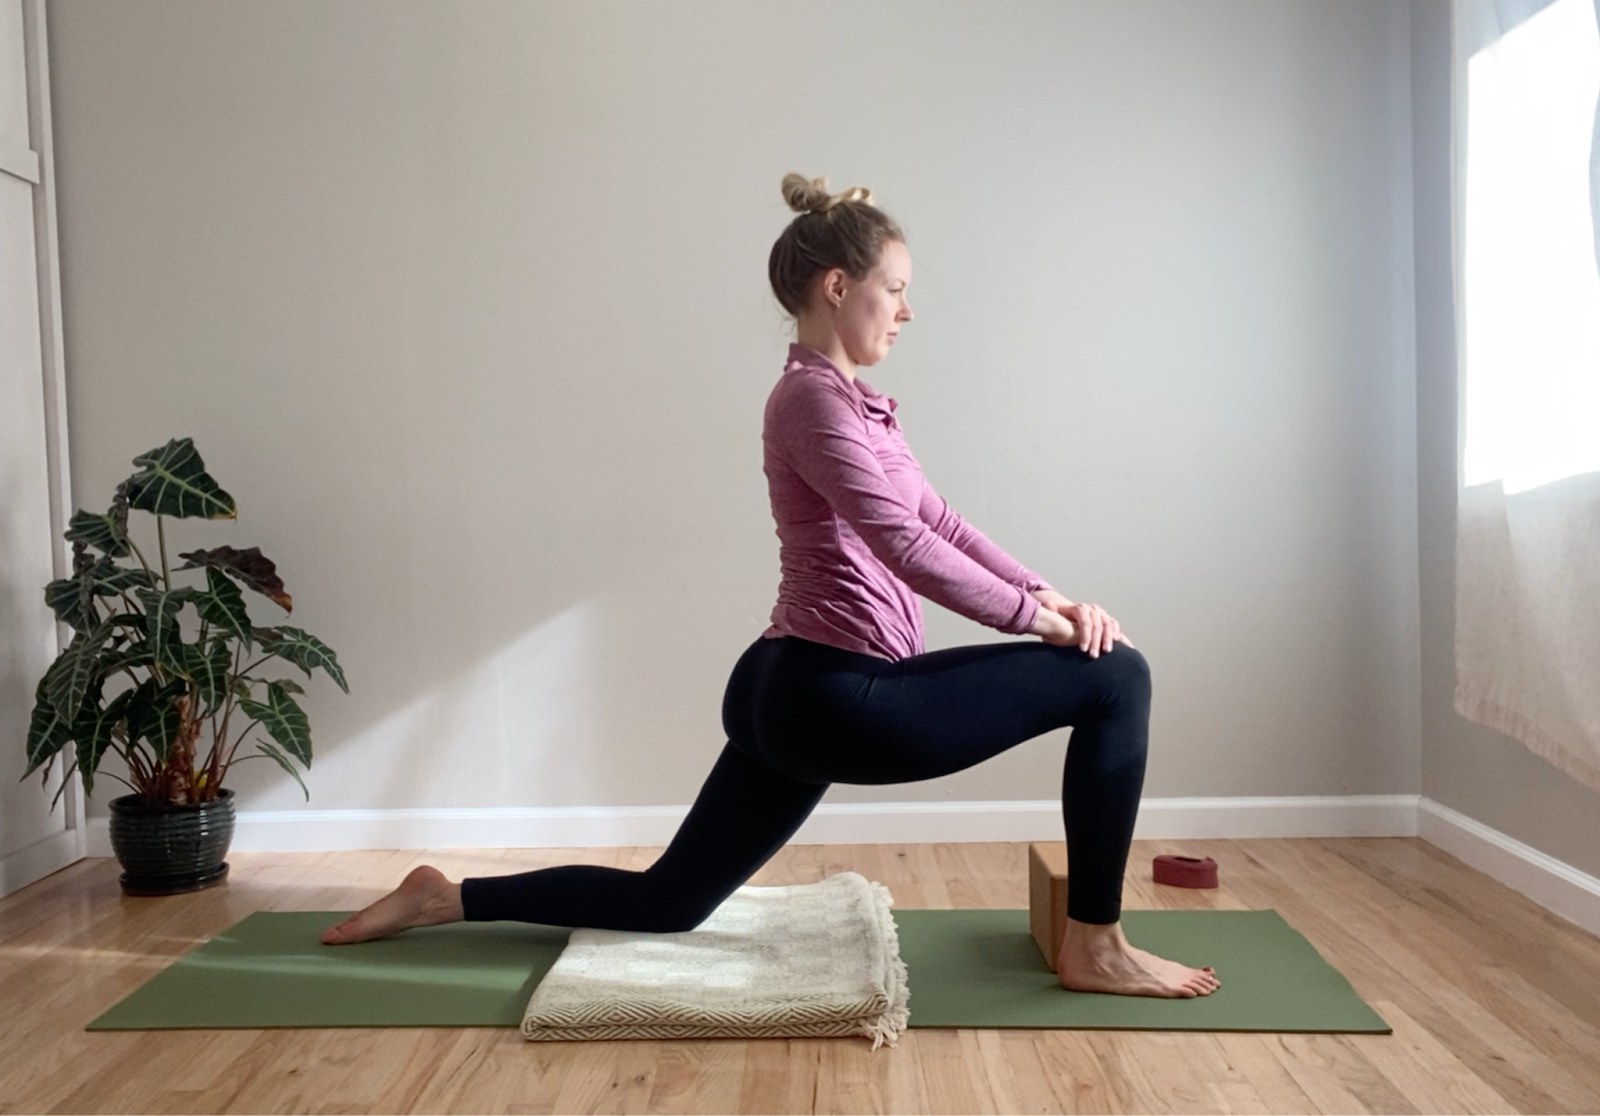
Modifications:
Place your hands on a nearby chair if needed for balance.
3. Bird Dog (Legs Only Shown)
Why it helps:
This pose strengthens the core, glutes, and lower back muscles. A strong core provides better support for the spine and reduces back pain.
How to perform:
Start in a tabletop position.
- Engage your core to keep your body stable.
- Extend your right leg back, keeping your hips even.
- If you would like more challenge, extend your left arm up (not pictured).
- Hold for 10-20 seconds, then return to the starting position.
- Repeat on the other side.
Perform 5-10 repetitions on each side.
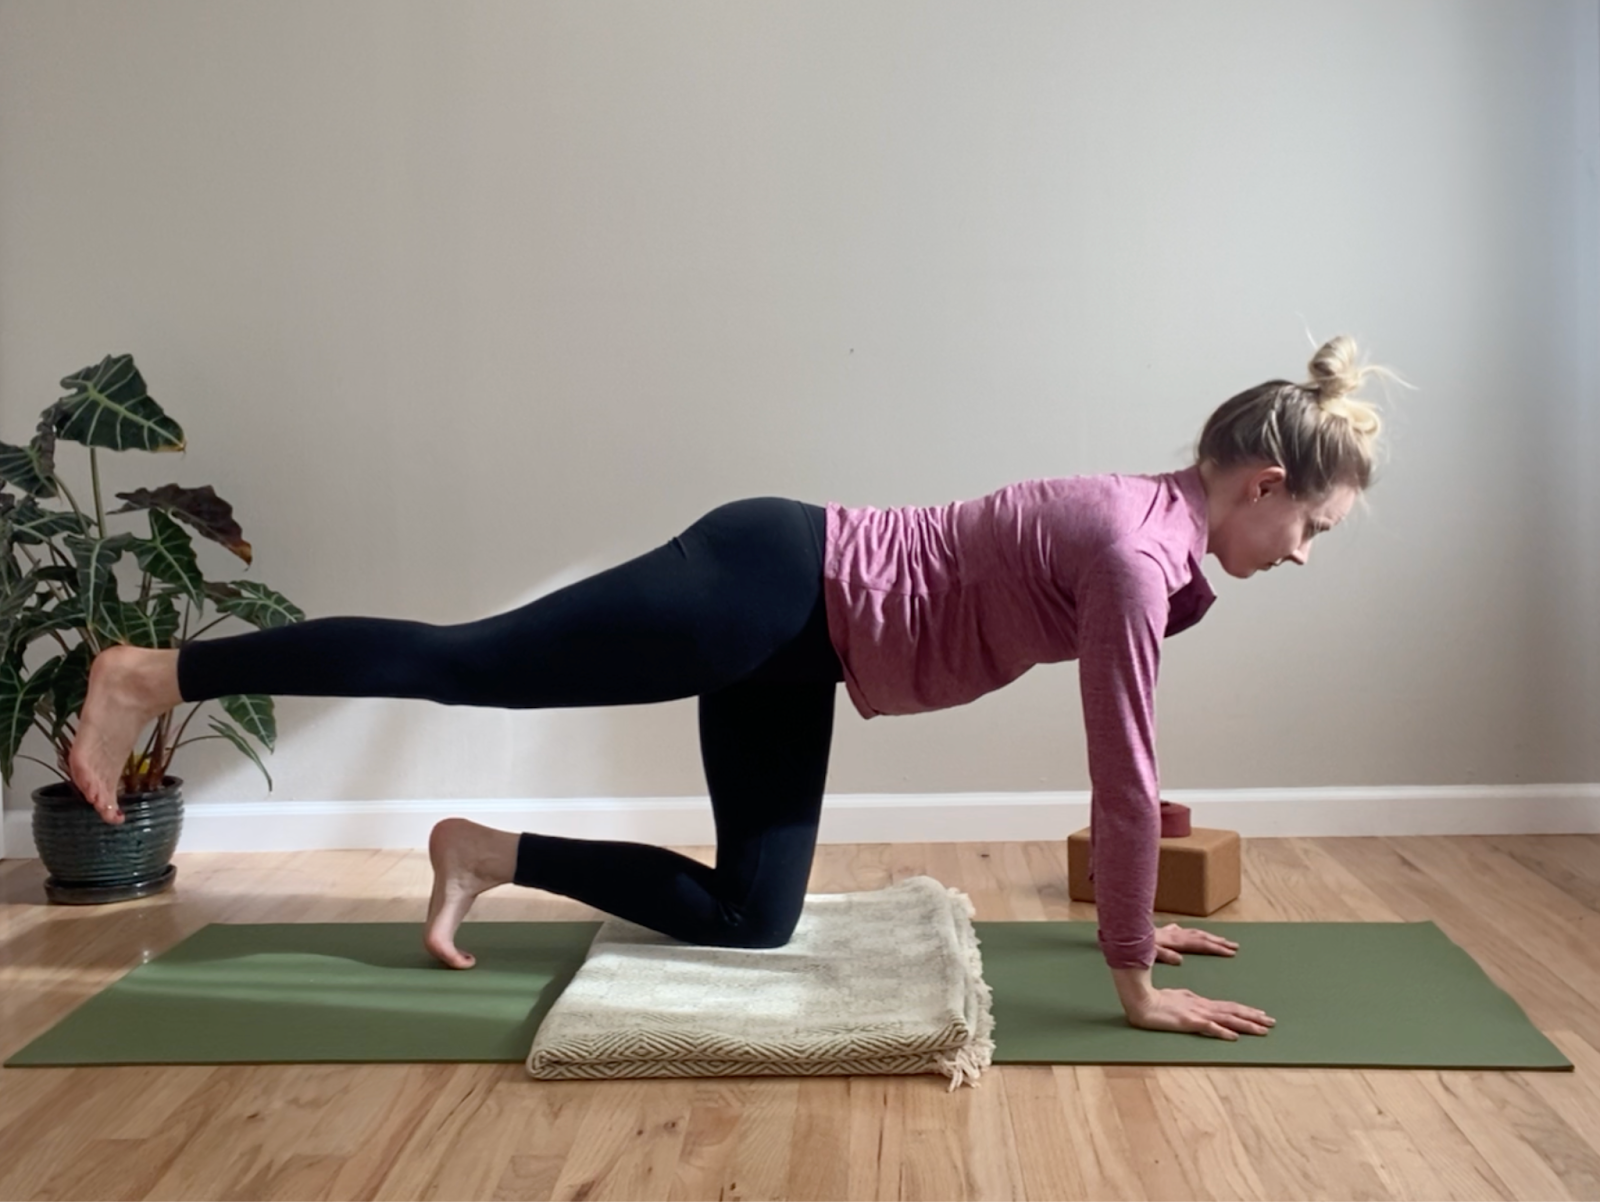
Modifications:
For an easier variation, keep your right toes in contact with the ground.
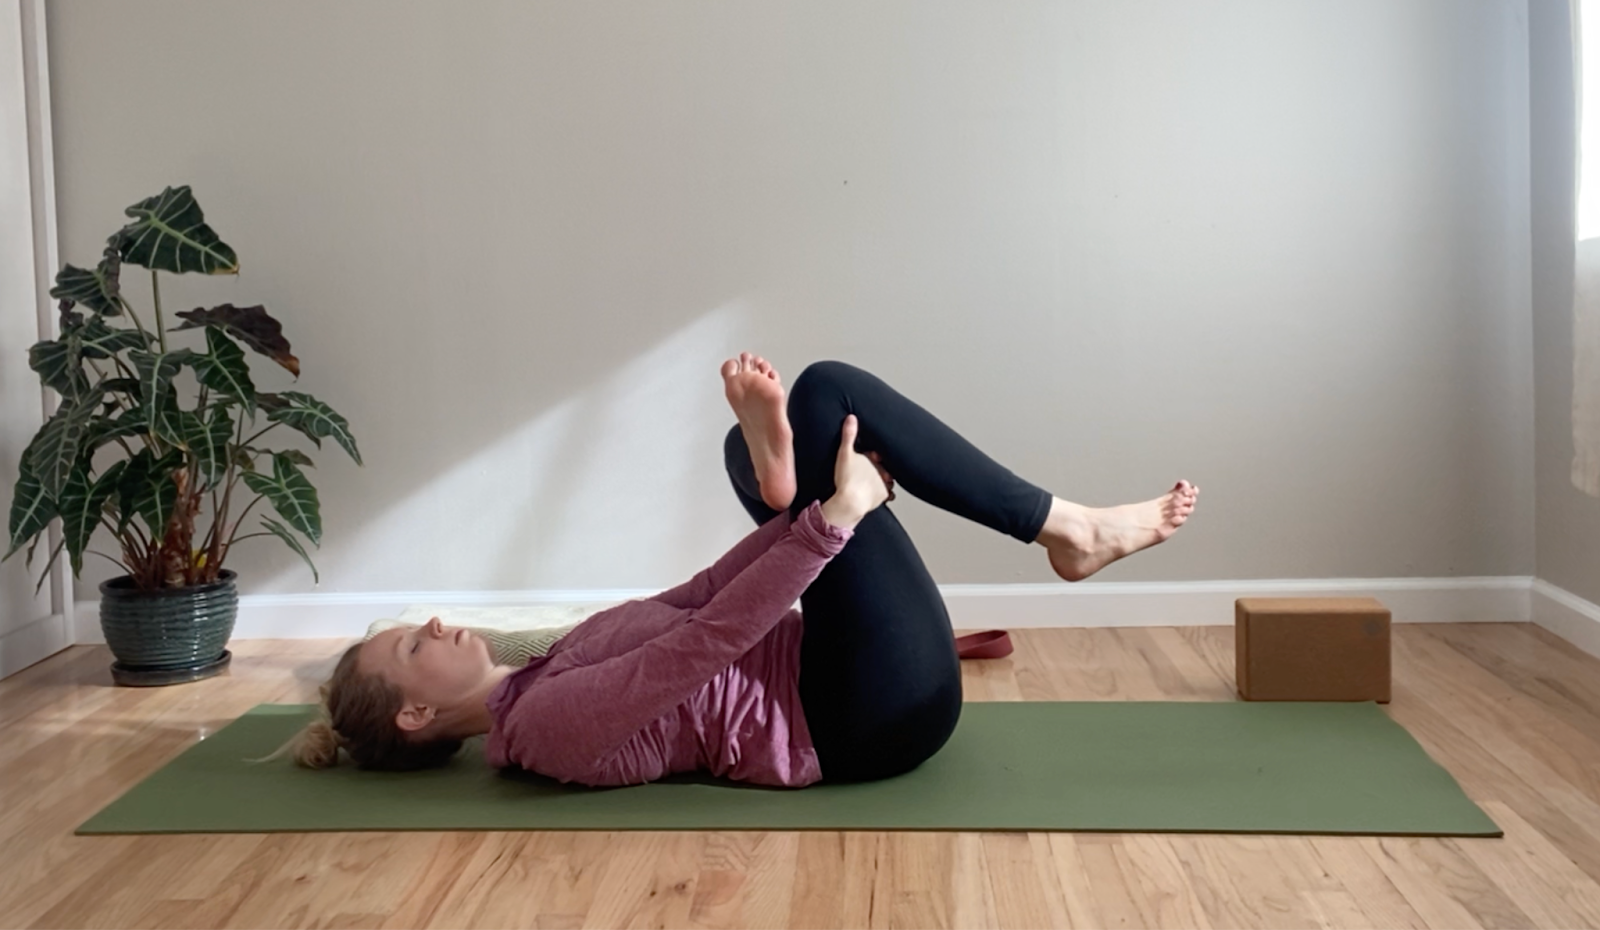
4. Supine Figure Four Stretch
Why it helps:
This stretch improves mobility in the hips, which reduces tension on the lower back. It also works by stretching the piriformis and glute muscles, which can contribute to sciatic nerve pain when tight.
How to perform:
Lie on your back with your knees bent and feet flat on the floor.
- Cross your left ankle over your right knee, creating a “figure four” shape.
- Clasp your hands behind your right thigh and gently pull it towards your chest.
Hold the stretch for 30 seconds to 1 minute, then switch sides.
Modifications:
You can use a strap around your right thigh if needed to help reach.
- If you feel a torque in your knee, flex your foot.
If the hips are unable to achieve this position, keep your right foot on the ground and gently push your left knee away.
Incorporate these poses into your daily routine to help relieve low back pain and promote overall spinal health. Remember to move mindfully and listen to your body, modifying as needed. If you would like to see these yoga poses as part of a sequence, click on the video below:
If you experience persistent pain or have any concerns, a physical therapist who understands the demands of yoga can help you. At Mend, we have several physical therapists who specialize in yoga: Dr. Rani Helvey-Byers (Boulder) Dr. Robert Adams (Boulder), and Dr. Erica Tran (Lafayette).
References:
- Ferreira ML, Luca K de, Haile LM, et al. Global, regional, and national burden of low back pain, 1990–2020, its attributable risk factors, and projections to 2050: a systematic analysis of the Global Burden of Disease Study 2021. The Lancet Rheumatology. 2023;5(6):e316-e329. doi:10.1016/S2665-9913(23)
00098-X - Fatoye F, Gebrye T, Ryan CG, Useh U, Mbada C. Global and regional estimates of clinical and economic burden of low back pain in high-income countries: a systematic review and meta-analysis. Front Public Health. 2023;11:1098100. doi:10.3389/fpubh.2023.1098100
- Tankha H, Gaskins D, Shallcross A, et al. Effectiveness of Virtual Yoga for Chronic Low Back Pain: A Randomized Clinical Trial. JAMA Netw Open. 2024;7(11):e2442339. doi:10.1001/jamanetworkopen.
2024.42339
